
Download it by clicking HERE. (v1.0.4)
Extract the zip file to a folder you want and open the file Project_Io.ino on the Arduino IDE.
If you perform the breadboard assembly correctly, the program should run OK.
Requirements
- The breadboard Assembly instructions are suited for: Arduino Duemilanove, Arduino Uno, Arduino Mega / 2560 (successfully tested on the first 3 ones).
- A JY-MCU / HC-06 Bluetooth module
- JY-MC on DX.com
- HC-06 on Banggod.com
- HC-06 on an AliExpress Trusted Seller
- 2 LEDs (green / yellow, suggested)
- 1 10Kohm resistor (for the switch)
- 2 220 ohm resistor (for the 2 LEDs)
- 1 breadboard micro switch / short button
- 1 breadboard
- Some wiring
Files
There are several files on the project:- Project_Io.ino: The main file for the application.
- A.h / A.cpp: These are the files where you should change things like:
- The handshake properties
- Template ID
- Application title
- Communication speed
- Arduino Pins initialization code, by changing the body of the function setupHardware()
- The way to turn the switches on / off, by changing the body of the function custom_SwitchChange()
- BluetoothHelper.h / .cpp: Contain functions to read / write from / to the bluetooth connection by the SoftwareSerial library
- BluetoothManager.h / .cpp: Contain functions to control the bluetooth setup
- HWHelper.h / .cpp: Contain functions to help with some arduino hardware interactions
- Protocol.h / .cpp: Contain the functions to handle the regular operation flow of the application
- Protocol_Basics.cpp: Contain functions to handle the handshake / hangup and switch packets received by the bluetooth module
- Types.h: Contains some constants used by the application
If the user do not intend to change the behavior of the application (to improve, or whatever), the files A.h and A.ccp are the only ones to be changed.
Breadboard Assembly
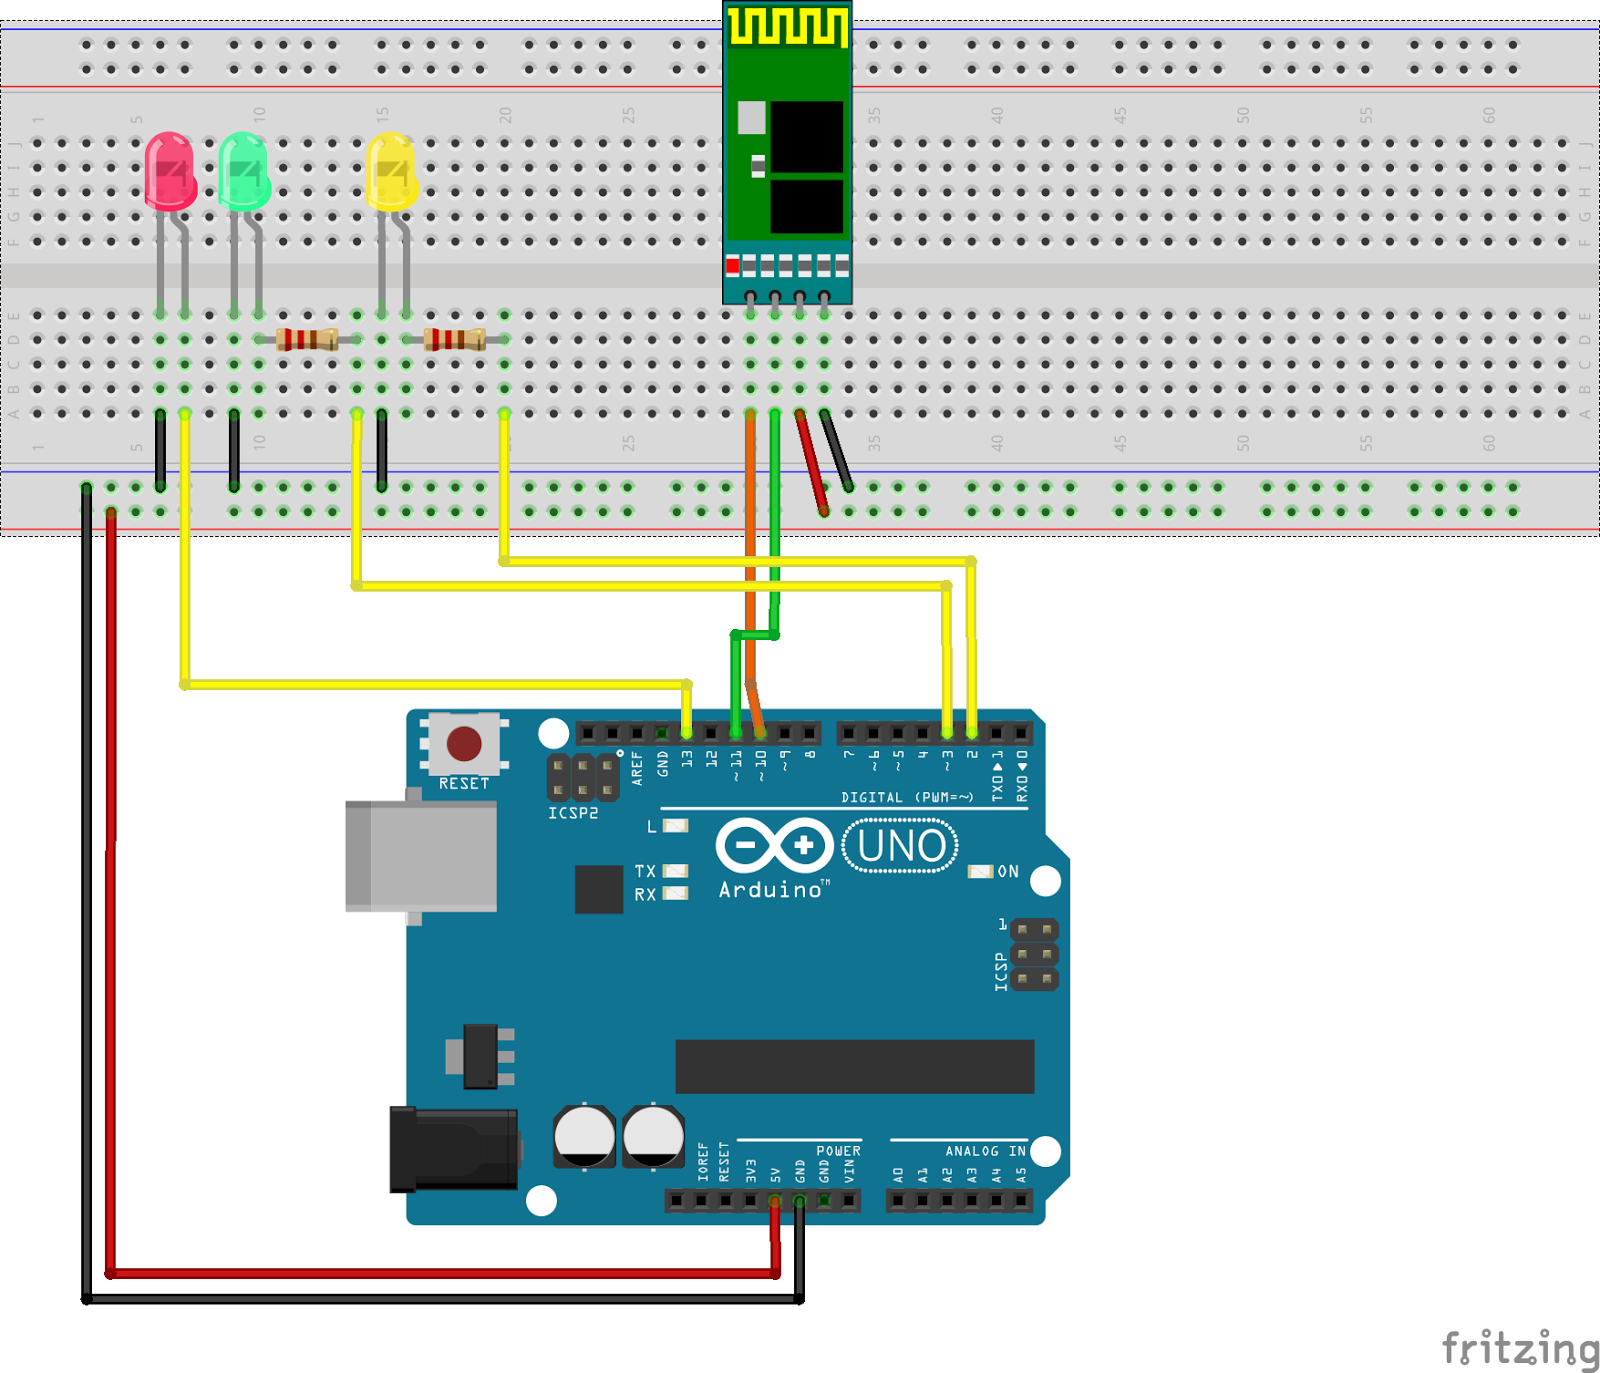
It is important to notice that:
- The red LED doesn't have a resistor because the Pin 13 of arduino already has an internal one. Also, some arduinos have an LED matching the pin 13 so, in this case, you don't need to use it (but you can).
Operation
- Assemble the arduino circuit
- Install the arduino application (after perform the changes, if necessary), or turn arduino on if the application is already installed
- The red LED starts blinking slowly for 5-10 seconds. Then it will start to blink like "blink, blink, blink, stops, blink, blink, blink, stops, ...." in 1 second +/- intervals
- Pair your android with the bluetooth device
- Open the android application
- Go to the bluetooth panel (pressing the bluetooth button on the header)
- Select the bluetooth device by tapping on it on the list
- If everything go OK, it should open the Switches screen allowing you to turn them on / off
No comments:
Post a Comment